Wednesday, January 22, 2025

Building Your Dream 16x20 Pergola: A Step-by-Step Guide

So, you're dreaming of a beautiful 16x20 pergola for those amazing outdoor gatherings? Fantastic! Building one yourself might seem daunting, but with a little planning and some elbow grease, it's totally doable. This guide will walk you through the process, from initial planning to the final flourish. Let's get started!

Phase 1: Planning & Preparation - Laying the Foundation for Success

Before you even think about touching a saw, you need a solid plan. This isn't just about throwing some lumber together; we’re talking about a structure that’ll last, providing shade and a gathering spot for years to come.

Choosing Your Location

Think carefully about where your pergola will live. Consider sunlight exposure (do you want full shade or dappled sunlight?), proximity to your house (for easy access to power and water if needed), and the overall aesthetic. Take some time to visualize how it will look and feel in different spots in your yard. You might even want to mark out the area with string or spray paint to get a better sense of its scale.

Permits and Regulations

This is super important! Check with your local council or homeowner's association about building permits and regulations. They might have specific requirements regarding height, setbacks from property lines, and even the type of wood you can use. Trust me, it's way better to get the paperwork sorted out upfront than to have a half-built pergola get shut down.

Gathering Your Materials

For a 16x20 pergola, you'll need a considerable amount of lumber. Pressure-treated lumber is a great choice because it resists rot and insects. Here’s a general list; quantities will depend on your specific design (remember to account for cuts and waste!):

  • 4x4 Posts: At least 8, depending on post spacing.
  • 2x6 Beams: Many, depending on beam spacing and pergola design. You will need these to run across the posts.
  • 2x4 Rafters: Numerous, these will create the lattice-like roof structure.
  • Concrete: For setting your posts.
  • Fasteners: Galvanized screws and possibly lag bolts for extra strength.
  • Optional: Lattice panels, stain or sealant, decorative elements.

Create a detailed shopping list, preferably with dimensions and quantities. It is easier to avoid mistakes when shopping with a plan. Don't forget to add extra materials â€" it's better to have some left over than to run short in the middle of the project.

Phase 2: Construction - Building the Frame

With your materials gathered and your plan in hand, it's time to get building! This is where things get a little more hands-on, so take your time and be precise.

Setting the Posts

This is crucial for stability. Dig holes (about 3 feet deep is a good starting point, but depth may vary depending on your location and soil type) for your posts, ensuring they're level and plumb. Use concrete to secure them, letting it cure completely before moving on. You might consider using a post-hole digger to make this job a bit easier.

Attaching the Beams

Once the concrete is set, you can attach the main beams to the posts. Use strong fasteners like galvanized lag screws to ensure a secure connection. Make sure the beams are perfectly level and spaced evenly â€" a level and a measuring tape are your best friends here.

Building the Rafter System

This is the most time-consuming part, but it's also where the pergola starts to take shape. Attach the rafters to the beams, creating the lattice-like roof structure. You might need to cut the rafters to fit, so take your time and measure carefully. Consider the spacing of your rafters carefully; closer spacing means more shade but also more work.

Phase 3: Finishing Touches - Adding the Final Details

You’ve built the frame. Now let's add those final details that will transform it from a simple structure to a beautiful outdoor space.

Adding Lattice

Lattice panels can add a touch of elegance and provide extra shade. These are relatively easy to attach to the rafters. There are many types of lattice available to match your pergola's style.

Finishing and Sealing

Give your pergola a protective finish with a high-quality stain or sealant. This will protect the wood from the elements and enhance its natural beauty. Choose a sealant that's appropriate for outdoor use and follow the manufacturer's instructions carefully. A couple of coats are usually recommended.

Adding Decorative Elements

Let your creativity shine! Consider adding climbing plants, hanging lights, or other decorative elements to personalize your pergola and make it truly your own. Think about things that will complement your home and garden.

Commonly Asked Questions

Here are some frequently asked questions to help clarify any lingering doubts:

How long does it take to build a 16x20 pergola?

This depends on your experience and how much time you can dedicate each day. Expect to spend several weekends or a few weeks, depending on your progress and the chosen construction style.

How much does it cost to build a 16x20 pergola?

The cost varies significantly based on materials (pressure treated vs. cedar, for example), your chosen design, and whether you hire any help. Plan a budget that includes all materials, tools, and potential unexpected expenses.

Can I build it myself?

Absolutely! With careful planning, patience, and a willingness to learn, you can definitely build a 16x20 pergola yourself. Plenty of online resources and tutorials are available to help you through every step.

What tools do I need?

You will need a variety of basic carpentry tools, including a measuring tape, level, saw (circular saw is recommended), drill, post-hole digger, shovel, and safety glasses. Make sure to use your tools safely and always wear appropriate protective gear.

What if I encounter problems during construction?

Don’t panic! Many online forums and communities are dedicated to DIY projects. Consult these, seek advice from experienced builders, and don’t hesitate to ask for help when needed.

Building your own 16x20 pergola is a rewarding project. Take your time, plan carefully, and enjoy the process. Soon you’ll be hosting amazing gatherings under your very own handcrafted shade structure!

Building Your Dream 16x20 Pergola: A Step-by-Step Guide

So, you're dreaming of a beautiful 16x20 pergola for those amazing outdoor gatherings? Fantastic! Building one yourself might seem daunting, but with a little planning and some elbow grease, it's totally doable. This guide will walk you through the process, from initial planning to the final flourish. Let's get started!

Phase 1: Planning & Preparation - Laying the Foundation for Success

Before you even think about touching a saw, you need a solid plan. This isn't just about throwing some lumber together; we’re talking about a structure that’ll last, providing shade and a gathering spot for years to come.

Choosing Your Location

Think carefully about where your pergola will live. Consider sunlight exposure (do you want full shade or dappled sunlight?), proximity to your house (for easy access to power and water if needed), and the overall aesthetic. Take some time to visualize how it will look and feel in different spots in your yard. You might even want to mark out the area with string or spray paint to get a better sense of its scale.

Permits and Regulations

This is super important! Check with your local council or homeowner's association about building permits and regulations. They might have specific requirements regarding height, setbacks from property lines, and even the type of wood you can use. Trust me, it's way better to get the paperwork sorted out upfront than to have a half-built pergola get shut down.

Gathering Your Materials

For a 16x20 pergola, you'll need a considerable amount of lumber. Pressure-treated lumber is a great choice because it resists rot and insects. Here’s a general list; quantities will depend on your specific design (remember to account for cuts and waste!):

  • 4x4 Posts: At least 8, depending on post spacing.
  • 2x6 Beams: Many, depending on beam spacing and pergola design. You will need these to run across the posts.
  • 2x4 Rafters: Numerous, these will create the lattice-like roof structure.
  • Concrete: For setting your posts.
  • Fasteners: Galvanized screws and possibly lag bolts for extra strength.
  • Optional: Lattice panels, stain or sealant, decorative elements.

Create a detailed shopping list, preferably with dimensions and quantities. It is easier to avoid mistakes when shopping with a plan. Don't forget to add extra materials â€" it's better to have some left over than to run short in the middle of the project.

Phase 2: Construction - Building the Frame

With your materials gathered and your plan in hand, it's time to get building! This is where things get a little more hands-on, so take your time and be precise.

Setting the Posts

This is crucial for stability. Dig holes (about 3 feet deep is a good starting point, but depth may vary depending on your location and soil type) for your posts, ensuring they're level and plumb. Use concrete to secure them, letting it cure completely before moving on. You might consider using a post-hole digger to make this job a bit easier.

Attaching the Beams

Once the concrete is set, you can attach the main beams to the posts. Use strong fasteners like galvanized lag screws to ensure a secure connection. Make sure the beams are perfectly level and spaced evenly â€" a level and a measuring tape are your best friends here.

Building the Rafter System

This is the most time-consuming part, but it's also where the pergola starts to take shape. Attach the rafters to the beams, creating the lattice-like roof structure. You might need to cut the rafters to fit, so take your time and measure carefully. Consider the spacing of your rafters carefully; closer spacing means more shade but also more work.

Phase 3: Finishing Touches - Adding the Final Details

You’ve built the frame. Now let's add those final details that will transform it from a simple structure to a beautiful outdoor space.

Adding Lattice

Lattice panels can add a touch of elegance and provide extra shade. These are relatively easy to attach to the rafters. There are many types of lattice available to match your pergola's style.

Finishing and Sealing

Give your pergola a protective finish with a high-quality stain or sealant. This will protect the wood from the elements and enhance its natural beauty. Choose a sealant that's appropriate for outdoor use and follow the manufacturer's instructions carefully. A couple of coats are usually recommended.

Adding Decorative Elements

Let your creativity shine! Consider adding climbing plants, hanging lights, or other decorative elements to personalize your pergola and make it truly your own. Think about things that will complement your home and garden.

Commonly Asked Questions

Here are some frequently asked questions to help clarify any lingering doubts:

How long does it take to build a 16x20 pergola?

This depends on your experience and how much time you can dedicate each day. Expect to spend several weekends or a few weeks, depending on your progress and the chosen construction style.

How much does it cost to build a 16x20 pergola?

The cost varies significantly based on materials (pressure treated vs. cedar, for example), your chosen design, and whether you hire any help. Plan a budget that includes all materials, tools, and potential unexpected expenses.

Can I build it myself?

Absolutely! With careful planning, patience, and a willingness to learn, you can definitely build a 16x20 pergola yourself. Plenty of online resources and tutorials are available to help you through every step.

What tools do I need?

You will need a variety of basic carpentry tools, including a measuring tape, level, saw (circular saw is recommended), drill, post-hole digger, shovel, and safety glasses. Make sure to use your tools safely and always wear appropriate protective gear.

What if I encounter problems during construction?

Don’t panic! Many online forums and communities are dedicated to DIY projects. Consult these, seek advice from experienced builders, and don’t hesitate to ask for help when needed.

Building your own 16x20 pergola is a rewarding project. Take your time, plan carefully, and enjoy the process. Soon you’ll be hosting amazing gatherings under your very own handcrafted shade structure!

Craft Your Dream Pergola: Free Plans for a Clean, Modern Aesthetic

Tired of generic outdoor structures? Yearning for a stylish and functional pergola that perfectly complements your modern home? This guide provides free, detailed plans to build your own stunning pergola, emphasizing clean lines and minimalist design. Forget expensive contractors and generic designs; empower yourself to create a beautiful outdoor space tailored to your exact needs and preferences.

Designing Your Minimalist Pergola: Key Considerations

Before diving into construction, careful planning is crucial. This ensures your pergola integrates seamlessly with your existing landscape and personal style. Consider the following:

Choosing the Perfect Location

Select a spot that receives adequate shade or sunlight, depending on your desired use. Think about proximity to your home, existing patio furniture, and potential views. Take measurements meticulously; accuracy is paramount for a structurally sound and aesthetically pleasing result. Consider the surrounding environment, avoiding areas prone to strong winds or excessive shade.

Material Selection: Embracing Clean Lines

For a modern aesthetic, opt for materials that exude simplicity and elegance. Pressure-treated lumber offers durability and affordability. Cedar provides natural beauty and resistance to rot, while ipé delivers exceptional strength and longevity, though at a higher cost. Consider the color and grain of the wood to ensure it harmonizes with your home’s exterior. Avoid overly ornate detailing; clean lines are key.

Dimensions and Design: Balancing Form and Function

Determine the dimensions based on your space and intended use. A smaller pergola might be perfect for a cozy seating area, while a larger one could accommodate a dining set or even a hot tub. Sketch your design, focusing on clean, straight lines and simple geometry. Avoid overly complex designs; simplicity reigns supreme in modern aesthetics. Factor in the height to ensure sufficient headroom and avoid an overwhelming presence.

Step-by-Step Construction: Your Free Pergola Plans

These free plans assume basic carpentry skills. Always prioritize safety and wear appropriate protective gear. Accurate measurements and precise cuts are essential for a professional-looking finish.

Foundation and Post Installation

Begin by preparing the foundation. Concrete footings offer superior stability. Set the posts securely within the footings, ensuring they are perfectly plumb and level. Use a spirit level to check repeatedly throughout the process. Accurate post placement is fundamental to the overall structural integrity of your pergola.

Beam and Rafter Assembly

Once the posts are firmly in place, attach the beams using appropriate connectors and screws. Ensure proper alignment and secure fastening to avoid any instability. Attach the rafters to the beams, maintaining consistent spacing and ensuring they're properly aligned and secured. This step demands accuracy to create a visually appealing and structurally sound roof.

Finishing Touches: Adding the Modern Flair

Sand all surfaces smooth, paying attention to any rough edges or splinters. Apply a high-quality sealant or stain to protect the wood from the elements and enhance its natural beauty. Choose a neutral color or a subtle tone that complements your existing landscaping. Add optional features such as LED lighting or climbing plants to further personalize your creation. This careful attention to detail will elevate your pergola from functional to stunning.

Beyond the Basics: Personalizing Your Pergola

While these plans provide a solid foundation, feel free to adapt them to suit your individual preferences. Consider adding:

  • Built-in seating: Incorporate benches or seating directly into the pergola's design.
  • Retractable shade: Integrate a retractable awning or shade sail for additional sun protection.
  • Lighting: Install string lights or integrated LED lighting to create ambiance.
  • Climbing plants: Train climbing vines to grow along the pergola for added greenery.

Let your creativity flow, and enjoy the process of building your unique, modern pergola. The satisfaction of creating something beautiful and functional with your own hands is unparalleled.

Craft Your Dream Pergola: Free Plans for a Clean, Modern Aesthetic

Tired of generic outdoor structures? Yearning for a stylish and functional pergola that perfectly complements your modern home? This guide provides free, detailed plans to build your own stunning pergola, emphasizing clean lines and minimalist design. Forget expensive contractors and generic designs; empower yourself to create a beautiful outdoor space tailored to your exact needs and preferences.

Designing Your Minimalist Pergola: Key Considerations

Before diving into construction, careful planning is crucial. This ensures your pergola integrates seamlessly with your existing landscape and personal style. Consider the following:

Choosing the Perfect Location

Select a spot that receives adequate shade or sunlight, depending on your desired use. Think about proximity to your home, existing patio furniture, and potential views. Take measurements meticulously; accuracy is paramount for a structurally sound and aesthetically pleasing result. Consider the surrounding environment, avoiding areas prone to strong winds or excessive shade.

Material Selection: Embracing Clean Lines

For a modern aesthetic, opt for materials that exude simplicity and elegance. Pressure-treated lumber offers durability and affordability. Cedar provides natural beauty and resistance to rot, while ipé delivers exceptional strength and longevity, though at a higher cost. Consider the color and grain of the wood to ensure it harmonizes with your home’s exterior. Avoid overly ornate detailing; clean lines are key.

Dimensions and Design: Balancing Form and Function

Determine the dimensions based on your space and intended use. A smaller pergola might be perfect for a cozy seating area, while a larger one could accommodate a dining set or even a hot tub. Sketch your design, focusing on clean, straight lines and simple geometry. Avoid overly complex designs; simplicity reigns supreme in modern aesthetics. Factor in the height to ensure sufficient headroom and avoid an overwhelming presence.

Step-by-Step Construction: Your Free Pergola Plans

These free plans assume basic carpentry skills. Always prioritize safety and wear appropriate protective gear. Accurate measurements and precise cuts are essential for a professional-looking finish.

Foundation and Post Installation

Begin by preparing the foundation. Concrete footings offer superior stability. Set the posts securely within the footings, ensuring they are perfectly plumb and level. Use a spirit level to check repeatedly throughout the process. Accurate post placement is fundamental to the overall structural integrity of your pergola.

Beam and Rafter Assembly

Once the posts are firmly in place, attach the beams using appropriate connectors and screws. Ensure proper alignment and secure fastening to avoid any instability. Attach the rafters to the beams, maintaining consistent spacing and ensuring they're properly aligned and secured. This step demands accuracy to create a visually appealing and structurally sound roof.

Finishing Touches: Adding the Modern Flair

Sand all surfaces smooth, paying attention to any rough edges or splinters. Apply a high-quality sealant or stain to protect the wood from the elements and enhance its natural beauty. Choose a neutral color or a subtle tone that complements your existing landscaping. Add optional features such as LED lighting or climbing plants to further personalize your creation. This careful attention to detail will elevate your pergola from functional to stunning.

Beyond the Basics: Personalizing Your Pergola

While these plans provide a solid foundation, feel free to adapt them to suit your individual preferences. Consider adding:

  • Built-in seating: Incorporate benches or seating directly into the pergola's design.
  • Retractable shade: Integrate a retractable awning or shade sail for additional sun protection.
  • Lighting: Install string lights or integrated LED lighting to create ambiance.
  • Climbing plants: Train climbing vines to grow along the pergola for added greenery.

Let your creativity flow, and enjoy the process of building your unique, modern pergola. The satisfaction of creating something beautiful and functional with your own hands is unparalleled.

Wednesday, November 20, 2024

DIY Beginner Woodworking Projects for Home and Garden

DIY Beginner Woodworking Projects for Home and Garden

Embarking on woodworking projects can be a rewarding experience, allowing you to create beautiful and functional pieces while developing valuable skills. Whether you are looking to spruce up your home décor, add charm to your garden, or simply unleash your creativity, there are numerous beginner-friendly woodworking projects that are perfect for getting started.

This guide will provide a comprehensive overview of DIY beginner woodworking projects for both home and garden, offering detailed instructions, tips, and resources to help you succeed.

Essential Tools and Materials

Before diving into any woodworking project, it is crucial to have the necessary tools and materials. While the specific requirements will vary based on the project, here are some essential items for beginners:

Hand Tools

  • Hammer: For driving nails and securing components.
  • Screwdriver set: Including both Phillips and flathead screwdrivers for different screw types.
  • Measuring tape: For accurate measurements and ensuring precise cuts.
  • Level: To ensure that surfaces are straight and horizontal.
  • Pencil: For marking cutting lines and transferring measurements.
  • Saw: A hand saw or a coping saw for making basic cuts.
  • Chisel: For shaping and carving wood.
  • Sandpaper: To smooth out surfaces and remove imperfections.
  • Clamps: To hold pieces of wood together securely.
  • Safety goggles: To protect your eyes from flying debris.

Power Tools (Optional)

While not strictly necessary for all beginner projects, certain power tools can make the process faster and easier. These include:

  • Power drill: For drilling holes and driving screws efficiently.
  • Circular saw: For making precise straight cuts through wood.
  • Jigsaw: For cutting curved shapes and intricate designs.

Wood

Choose wood that is appropriate for your project. For beginners, softwoods like pine or cedar are generally easier to work with. Hardwood options like oak or maple offer greater durability but can be more challenging to cut.

Home Projects

Wooden Coasters

A simple yet elegant project, wooden coasters are a great way to personalize your home décor. You can use scrap wood or purchase pre-cut squares. Sand the wood to a smooth finish, apply a stain or paint, and attach felt pads to the bottom to protect your furniture.

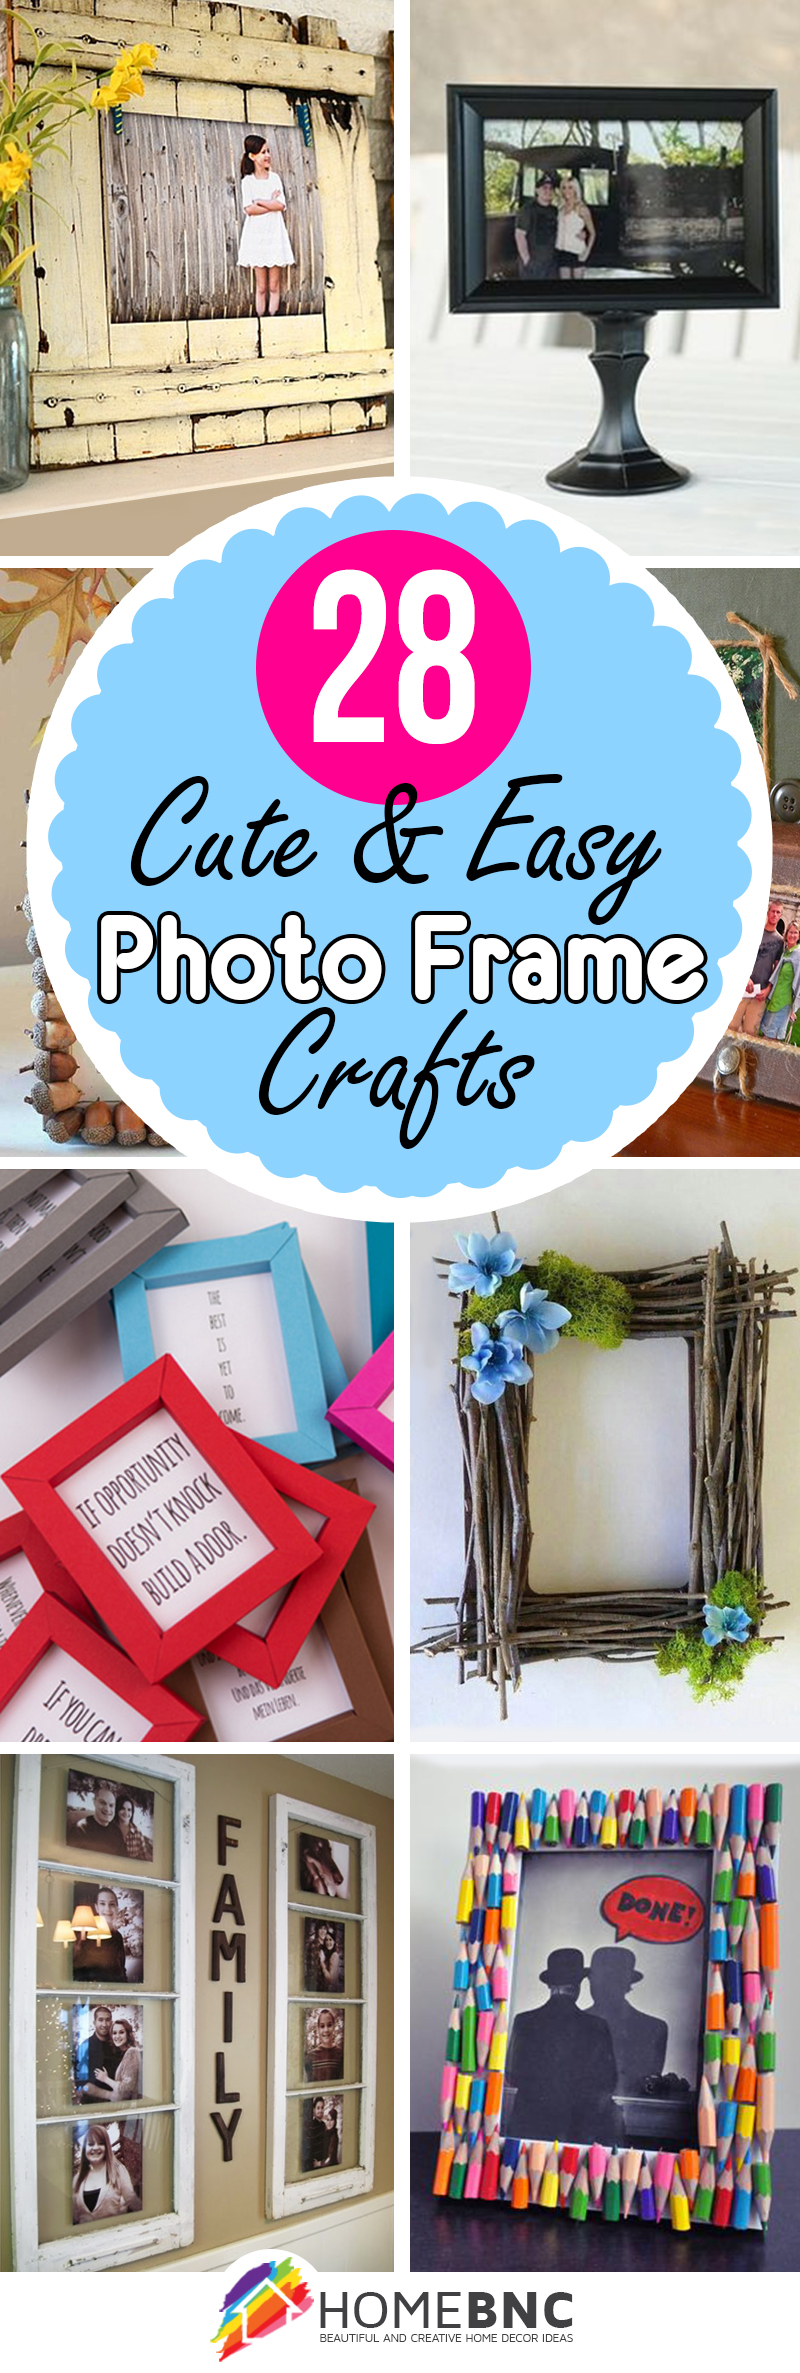
Picture Frame

Creating a custom picture frame is a fun and rewarding project. Choose a picture size and cut the wood to the appropriate dimensions. Join the pieces together with wood glue and clamps, then sand the edges. Add a decorative trim or paint the frame for a personalized touch.

Rustic Shelf

A rustic shelf can add a touch of warmth and character to any room. Use reclaimed wood or rough-cut lumber for a rustic aesthetic. Cut the shelves and supports to size, then secure them together using screws or dowels. Finish with a clear coat to protect the wood.

Wooden Box

A wooden box can be used for storage, organization, or as a decorative accent. Cut the wood to the desired dimensions, join the pieces together with glue and nails, and add a lid. You can customize the box with paint, stain, or decorative hardware.

Garden Projects

Birdhouse

Birdhouses are not only functional but also aesthetically pleasing. Choose a birdhouse design that suits your preference and cut the wood to size. Assemble the pieces using wood glue and nails. Add a perch and an entrance hole. To make it even more inviting, consider adding a natural, bird-safe stain.

Planter Box

A planter box is a great way to add greenery to your garden or patio. Build a simple rectangular box using wood planks. You can stain or paint the wood to match your existing décor. Add drainage holes to the bottom for proper water flow.

Garden Trellis

A garden trellis can provide support for climbing plants and add a decorative element to your landscape. Cut the wood to the desired size and shape, then assemble the trellis using screws or dowels. You can create different patterns and designs to complement your garden theme.

Wooden Garden Markers

Wooden garden markers are a practical and attractive way to identify your plants. Use small pieces of scrap wood and cut them into shapes or write labels using a wood-burning tool. You can paint them or leave them natural for a rustic look.

Tips for Success

  • Start with simple projects: Choose projects that are within your skill level and gradually progress to more complex designs.
  • Plan your project: Carefully measure and draw out your design before you start cutting wood.
  • Practice safe woodworking: Always wear safety goggles, use sharp tools, and be aware of potential hazards.
  • Use quality tools: Investing in good quality tools will make your projects easier and more enjoyable.
  • Don't be afraid to make mistakes: Everyone makes mistakes in woodworking. Learn from them and keep practicing.
  • Take your time: Rushing through a project can lead to errors. Take your time and work carefully.
  • Enjoy the process: Woodworking is a rewarding hobby. Take pride in your work and enjoy the journey.

Resources and Inspiration

There are numerous resources available for beginner woodworkers, including:

  • Books: Many woodworking books offer step-by-step instructions and tips for beginners.
  • Websites: Online woodworking communities and websites provide tutorials, project plans, and inspiration.
  • YouTube: Search for woodworking tutorials and videos for step-by-step guidance.
  • Local woodworking classes: Many community centers and craft stores offer woodworking classes for beginners.

With a little time, effort, and the right tools, you can create stunning woodworking projects that enhance your home, garden, and overall lifestyle. Embrace the learning process, have fun, and enjoy the satisfaction of crafting beautiful and functional items with your own hands.

DIY Beginner Woodworking Projects for Home and Garden

DIY Beginner Woodworking Projects for Home and Garden

Embarking on woodworking projects can be a rewarding experience, allowing you to create beautiful and functional pieces while developing valuable skills. Whether you are looking to spruce up your home décor, add charm to your garden, or simply unleash your creativity, there are numerous beginner-friendly woodworking projects that are perfect for getting started.

This guide will provide a comprehensive overview of DIY beginner woodworking projects for both home and garden, offering detailed instructions, tips, and resources to help you succeed.

Essential Tools and Materials

Before diving into any woodworking project, it is crucial to have the necessary tools and materials. While the specific requirements will vary based on the project, here are some essential items for beginners:

Hand Tools

  • Hammer: For driving nails and securing components.
  • Screwdriver set: Including both Phillips and flathead screwdrivers for different screw types.
  • Measuring tape: For accurate measurements and ensuring precise cuts.
  • Level: To ensure that surfaces are straight and horizontal.
  • Pencil: For marking cutting lines and transferring measurements.
  • Saw: A hand saw or a coping saw for making basic cuts.
  • Chisel: For shaping and carving wood.
  • Sandpaper: To smooth out surfaces and remove imperfections.
  • Clamps: To hold pieces of wood together securely.
  • Safety goggles: To protect your eyes from flying debris.

Power Tools (Optional)

While not strictly necessary for all beginner projects, certain power tools can make the process faster and easier. These include:

  • Power drill: For drilling holes and driving screws efficiently.
  • Circular saw: For making precise straight cuts through wood.
  • Jigsaw: For cutting curved shapes and intricate designs.

Wood

Choose wood that is appropriate for your project. For beginners, softwoods like pine or cedar are generally easier to work with. Hardwood options like oak or maple offer greater durability but can be more challenging to cut.

Home Projects

Wooden Coasters

A simple yet elegant project, wooden coasters are a great way to personalize your home décor. You can use scrap wood or purchase pre-cut squares. Sand the wood to a smooth finish, apply a stain or paint, and attach felt pads to the bottom to protect your furniture.

Picture Frame

Creating a custom picture frame is a fun and rewarding project. Choose a picture size and cut the wood to the appropriate dimensions. Join the pieces together with wood glue and clamps, then sand the edges. Add a decorative trim or paint the frame for a personalized touch.

Rustic Shelf

A rustic shelf can add a touch of warmth and character to any room. Use reclaimed wood or rough-cut lumber for a rustic aesthetic. Cut the shelves and supports to size, then secure them together using screws or dowels. Finish with a clear coat to protect the wood.

Wooden Box

A wooden box can be used for storage, organization, or as a decorative accent. Cut the wood to the desired dimensions, join the pieces together with glue and nails, and add a lid. You can customize the box with paint, stain, or decorative hardware.

Garden Projects

Birdhouse

Birdhouses are not only functional but also aesthetically pleasing. Choose a birdhouse design that suits your preference and cut the wood to size. Assemble the pieces using wood glue and nails. Add a perch and an entrance hole. To make it even more inviting, consider adding a natural, bird-safe stain.

Planter Box

A planter box is a great way to add greenery to your garden or patio. Build a simple rectangular box using wood planks. You can stain or paint the wood to match your existing décor. Add drainage holes to the bottom for proper water flow.

Garden Trellis

A garden trellis can provide support for climbing plants and add a decorative element to your landscape. Cut the wood to the desired size and shape, then assemble the trellis using screws or dowels. You can create different patterns and designs to complement your garden theme.

Wooden Garden Markers

Wooden garden markers are a practical and attractive way to identify your plants. Use small pieces of scrap wood and cut them into shapes or write labels using a wood-burning tool. You can paint them or leave them natural for a rustic look.

Tips for Success

  • Start with simple projects: Choose projects that are within your skill level and gradually progress to more complex designs.
  • Plan your project: Carefully measure and draw out your design before you start cutting wood.
  • Practice safe woodworking: Always wear safety goggles, use sharp tools, and be aware of potential hazards.
  • Use quality tools: Investing in good quality tools will make your projects easier and more enjoyable.
  • Don't be afraid to make mistakes: Everyone makes mistakes in woodworking. Learn from them and keep practicing.
  • Take your time: Rushing through a project can lead to errors. Take your time and work carefully.
  • Enjoy the process: Woodworking is a rewarding hobby. Take pride in your work and enjoy the journey.

Resources and Inspiration

There are numerous resources available for beginner woodworkers, including:

  • Books: Many woodworking books offer step-by-step instructions and tips for beginners.
  • Websites: Online woodworking communities and websites provide tutorials, project plans, and inspiration.
  • YouTube: Search for woodworking tutorials and videos for step-by-step guidance.
  • Local woodworking classes: Many community centers and craft stores offer woodworking classes for beginners.

With a little time, effort, and the right tools, you can create stunning woodworking projects that enhance your home, garden, and overall lifestyle. Embrace the learning process, have fun, and enjoy the satisfaction of crafting beautiful and functional items with your own hands.

How to Improve Your Woodworking with Dado Cuts

Elevate Your Woodworking: Mastering the Art of Dado Cuts

In the realm of woodworking, precision is paramount. Among the myriad techniques employed to achieve accurate and aesthetically pleasing results, dado cuts stand as a cornerstone. A dado cut, essentially a rectangular groove cut across the width of a workpiece, serves numerous purposes, from creating robust joinery to enhancing the visual appeal of furniture and other wood projects. Mastering this technique can significantly elevate your woodworking skills, unlocking a world of possibilities.

Understanding the Basics of Dado Cuts

Before delving into the intricacies of dado cuts, let's first grasp the fundamentals. A dado cut is a rectangular or square groove, typically cut across the grain of the wood. Its primary function is to create a space for another piece of wood to fit, forming a strong and often visually appealing joint. The depth and width of a dado cut are critical factors, dictated by the specific application and design requirements of the project.

The Advantages of Dado Cuts

Dado cuts offer a multitude of benefits for woodworkers, making them a versatile and indispensable tool:

Stronger Joinery

Dado cuts provide superior strength and stability compared to simple butt joints, effectively preventing wood from splitting or separating under stress. This strength is particularly crucial for furniture, shelves, and other structures subjected to significant load.

Enhanced Aesthetics

Dado cuts can add a sophisticated touch to projects, creating clean lines and intricate details that enhance the overall visual appeal. From decorative shelves to intricate cabinet designs, dado cuts can elevate the aesthetic quality of woodworking projects.

Versatility

Dado cuts can be incorporated into a wide array of woodworking projects, from simple boxes to elaborate furniture pieces. Their versatility allows for the creation of various joints, including dado-and-tenon joints, dado-and-shelf joints, and dado-and-panel joints, each serving a specific purpose.

Reduced Waste

By creating precisely sized grooves, dado cuts minimize wood waste compared to traditional methods like mortise-and-tenon joints. This efficiency is particularly beneficial for working with expensive or scarce wood species.

Tools for Creating Dado Cuts

Several tools are commonly used to create dado cuts, each with its own advantages and limitations:

Table Saw

The table saw is a versatile tool that allows for precise and repeatable dado cuts. By utilizing a dado stack consisting of multiple blades, it can cut grooves of varying depths and widths. The table saw's ability to make cuts across the entire width of a workpiece makes it ideal for large dado cuts.

Router

A router, equipped with a dado bit, is a highly maneuverable tool that can create dado cuts in tight spaces and around corners. Dado bits are specialized router bits designed to cut rectangular grooves with precise dimensions. Routers offer flexibility for cutting smaller dados or intricate patterns.

Hand Tools

Traditional hand tools such as chisels and saws can also be employed for dado cuts, albeit with a more time-consuming and labor-intensive approach. This method is suitable for smaller dados or projects where precision is not paramount.

Techniques for Making Dado Cuts

Regardless of the tool used, precise techniques are paramount for successful dado cuts. Here's a breakdown of essential steps:

Measure and Mark Carefully

Accuracy is key. Carefully measure the width and depth of the dado cut, marking the workpiece precisely using a pencil or marking gauge. Double-checking measurements is crucial to prevent errors that can lead to misaligned joints and structural issues.

Set Up the Tool Properly

Whether using a table saw, router, or hand tools, ensuring proper tool setup is essential for consistent and accurate cuts. Adjust blade heights, fences, and other settings meticulously to match the desired dado dimensions. Refer to the tool's manual for specific setup instructions.

Make Test Cuts

Before cutting into the actual workpiece, it's wise to make a test cut on a scrap piece of wood. This allows you to check the accuracy of the tool setup and make any necessary adjustments to ensure the final dado meets the desired dimensions.

Cut Slowly and Carefully

Rushing the process can lead to errors and damage. Cut slowly and steadily, maintaining a firm grip on the tool and allowing it to move smoothly through the wood. Avoid excessive force or abrupt movements that can cause the tool to bind or create uneven cuts.

Clean Up After Cutting

After cutting, use a chisel or sandpaper to smooth any rough edges or uneven surfaces created by the dado cut. This ensures a clean, professional finish and prevents any splintering or irregularities that could affect the strength and appearance of the joint.

Tips for Achieving Professional Dado Cuts

Here are some additional tips to help you master the art of dado cuts:

  • Use a dado set on your table saw for precise cuts and uniform depth.
  • Utilize a dado jig to ensure accuracy and consistency, particularly when creating multiple identical dados.
  • For intricate designs or curved dado cuts, consider using a router with a specialized dado bit.
  • Always wear appropriate safety gear, including eye protection, hearing protection, and dust masks, when working with woodworking tools.
  • Practice patience and precision, as mastering dado cuts takes time and experience.

Conclusion

Dado cuts are a fundamental woodworking technique that can significantly elevate your projects. By understanding the principles, utilizing appropriate tools, and following precise techniques, you can create robust and aesthetically pleasing joinery, enhancing the strength, durability, and visual appeal of your creations. With practice and persistence, you can master the art of dado cuts and unlock a world of woodworking possibilities.

How to Improve Your Woodworking with Dado Cuts

Elevate Your Woodworking: Mastering the Art of Dado Cuts

In the realm of woodworking, precision is paramount. Among the myriad techniques employed to achieve accurate and aesthetically pleasing results, dado cuts stand as a cornerstone. A dado cut, essentially a rectangular groove cut across the width of a workpiece, serves numerous purposes, from creating robust joinery to enhancing the visual appeal of furniture and other wood projects. Mastering this technique can significantly elevate your woodworking skills, unlocking a world of possibilities.

Understanding the Basics of Dado Cuts

Before delving into the intricacies of dado cuts, let's first grasp the fundamentals. A dado cut is a rectangular or square groove, typically cut across the grain of the wood. Its primary function is to create a space for another piece of wood to fit, forming a strong and often visually appealing joint. The depth and width of a dado cut are critical factors, dictated by the specific application and design requirements of the project.

The Advantages of Dado Cuts

Dado cuts offer a multitude of benefits for woodworkers, making them a versatile and indispensable tool:

Stronger Joinery

Dado cuts provide superior strength and stability compared to simple butt joints, effectively preventing wood from splitting or separating under stress. This strength is particularly crucial for furniture, shelves, and other structures subjected to significant load.

Enhanced Aesthetics

Dado cuts can add a sophisticated touch to projects, creating clean lines and intricate details that enhance the overall visual appeal. From decorative shelves to intricate cabinet designs, dado cuts can elevate the aesthetic quality of woodworking projects.

Versatility

Dado cuts can be incorporated into a wide array of woodworking projects, from simple boxes to elaborate furniture pieces. Their versatility allows for the creation of various joints, including dado-and-tenon joints, dado-and-shelf joints, and dado-and-panel joints, each serving a specific purpose.

Reduced Waste

By creating precisely sized grooves, dado cuts minimize wood waste compared to traditional methods like mortise-and-tenon joints. This efficiency is particularly beneficial for working with expensive or scarce wood species.

Tools for Creating Dado Cuts

Several tools are commonly used to create dado cuts, each with its own advantages and limitations:

Table Saw

The table saw is a versatile tool that allows for precise and repeatable dado cuts. By utilizing a dado stack consisting of multiple blades, it can cut grooves of varying depths and widths. The table saw's ability to make cuts across the entire width of a workpiece makes it ideal for large dado cuts.

Router

A router, equipped with a dado bit, is a highly maneuverable tool that can create dado cuts in tight spaces and around corners. Dado bits are specialized router bits designed to cut rectangular grooves with precise dimensions. Routers offer flexibility for cutting smaller dados or intricate patterns.

Hand Tools

Traditional hand tools such as chisels and saws can also be employed for dado cuts, albeit with a more time-consuming and labor-intensive approach. This method is suitable for smaller dados or projects where precision is not paramount.

Techniques for Making Dado Cuts

Regardless of the tool used, precise techniques are paramount for successful dado cuts. Here's a breakdown of essential steps:

Measure and Mark Carefully

Accuracy is key. Carefully measure the width and depth of the dado cut, marking the workpiece precisely using a pencil or marking gauge. Double-checking measurements is crucial to prevent errors that can lead to misaligned joints and structural issues.

Set Up the Tool Properly

Whether using a table saw, router, or hand tools, ensuring proper tool setup is essential for consistent and accurate cuts. Adjust blade heights, fences, and other settings meticulously to match the desired dado dimensions. Refer to the tool's manual for specific setup instructions.

Make Test Cuts

Before cutting into the actual workpiece, it's wise to make a test cut on a scrap piece of wood. This allows you to check the accuracy of the tool setup and make any necessary adjustments to ensure the final dado meets the desired dimensions.

Cut Slowly and Carefully

Rushing the process can lead to errors and damage. Cut slowly and steadily, maintaining a firm grip on the tool and allowing it to move smoothly through the wood. Avoid excessive force or abrupt movements that can cause the tool to bind or create uneven cuts.

Clean Up After Cutting

After cutting, use a chisel or sandpaper to smooth any rough edges or uneven surfaces created by the dado cut. This ensures a clean, professional finish and prevents any splintering or irregularities that could affect the strength and appearance of the joint.

Tips for Achieving Professional Dado Cuts

Here are some additional tips to help you master the art of dado cuts:

  • Use a dado set on your table saw for precise cuts and uniform depth.
  • Utilize a dado jig to ensure accuracy and consistency, particularly when creating multiple identical dados.
  • For intricate designs or curved dado cuts, consider using a router with a specialized dado bit.
  • Always wear appropriate safety gear, including eye protection, hearing protection, and dust masks, when working with woodworking tools.
  • Practice patience and precision, as mastering dado cuts takes time and experience.

Conclusion

Dado cuts are a fundamental woodworking technique that can significantly elevate your projects. By understanding the principles, utilizing appropriate tools, and following precise techniques, you can create robust and aesthetically pleasing joinery, enhancing the strength, durability, and visual appeal of your creations. With practice and persistence, you can master the art of dado cuts and unlock a world of woodworking possibilities.

Creative Wood Project Ideas That Will Add Style to Any Room

Creative Wood Project Ideas That Will Add Style to Any Room

Wood is a timeless and versatile material that can add warmth, character, and a touch of rustic charm to any room. Whether you're a seasoned DIYer or just starting out, there are countless creative wood projects that you can tackle to personalize your space and showcase your unique style. From simple accent pieces to intricate statement furniture, the possibilities are endless!

Rustic and Charming Wood Projects

Embrace the natural beauty of wood with these rustic and charming project ideas. These projects are perfect for adding a touch of warmth and character to any room.

DIY Wooden Wall Art

Transform ordinary branches, reclaimed wood, or even old pallets into stunning wall art. Create geometric patterns, abstract shapes, or even a unique family tree. For a truly personalized touch, add a touch of paint, stain, or even decoupage to create your own masterpiece.

Rustic Wood Shelves

Add some rustic charm to your living room, kitchen, or bedroom with handcrafted wooden shelves. Use reclaimed wood, salvaged barn wood, or even rough-cut lumber to create unique and functional storage solutions. You can leave the wood natural or distress it for a vintage look. Combine different sizes and shapes of shelves for a truly eclectic look.

Wooden Planters

Bring the outdoors in with personalized wooden planters. Use scraps of wood to create simple geometric planters or craft elaborate boxes with intricate details. You can paint them in bright colors, stain them for a rustic look, or leave them natural to let the wood grain shine through. These planters are perfect for showcasing your favorite plants and adding a touch of greenery to your space.

Modern and Minimalist Wood Projects

If you prefer a cleaner, more contemporary aesthetic, these modern and minimalist wood projects will elevate your space with a touch of sophistication.

Geometric Wooden Mirror

Elevate your entryway or bathroom with a statement-making wooden mirror. Create a geometric frame using thin strips of wood in a contrasting color. You can choose from simple squares, sleek triangles, or even intricate patterns. This project allows you to express your unique style while adding a touch of modern elegance to your space.

Wooden Storage Boxes

Keep your belongings organized in style with handcrafted wooden storage boxes. Use smooth, polished wood and simple geometric shapes to create a minimalist and functional design. You can use a single type of wood for a cohesive look or experiment with different types for a more eclectic feel. These boxes can be used to store jewelry, craft supplies, or even as decorative accents on your coffee table.

Wooden Coasters

Add a touch of sophistication to your coffee table with unique wooden coasters. Choose from smooth, polished wood or experiment with contrasting wood types to create striking designs. You can even add a personalized touch by engraving your initials or a special message on the coasters. These coasters are both practical and stylish, adding a touch of warmth to your living space.

Tips for Success with Your Wood Projects

Here are a few tips to make your wood project a success:

  • Start with a well-defined plan and gather all the necessary tools and materials before you begin.
  • Measure twice, cut once! Accuracy is crucial for a professional-looking finish.
  • Use the right type of wood for your project. Consider the desired look, durability, and ease of working with the wood.
  • Don't be afraid to experiment with different stains, paints, and finishes to achieve your desired look.
  • Take your time, enjoy the process, and be proud of your creation!

With a little creativity and effort, you can transform your home with stunning wood projects that reflect your unique style and bring a touch of warmth and charm to any room.

Creative Wood Project Ideas That Will Add Style to Any Room

Creative Wood Project Ideas That Will Add Style to Any Room

Wood is a timeless and versatile material that can add warmth, character, and a touch of rustic charm to any room. Whether you're a seasoned DIYer or just starting out, there are countless creative wood projects that you can tackle to personalize your space and showcase your unique style. From simple accent pieces to intricate statement furniture, the possibilities are endless!

Rustic and Charming Wood Projects

Embrace the natural beauty of wood with these rustic and charming project ideas. These projects are perfect for adding a touch of warmth and character to any room.

DIY Wooden Wall Art

Transform ordinary branches, reclaimed wood, or even old pallets into stunning wall art. Create geometric patterns, abstract shapes, or even a unique family tree. For a truly personalized touch, add a touch of paint, stain, or even decoupage to create your own masterpiece.

Rustic Wood Shelves

Add some rustic charm to your living room, kitchen, or bedroom with handcrafted wooden shelves. Use reclaimed wood, salvaged barn wood, or even rough-cut lumber to create unique and functional storage solutions. You can leave the wood natural or distress it for a vintage look. Combine different sizes and shapes of shelves for a truly eclectic look.

Wooden Planters

Bring the outdoors in with personalized wooden planters. Use scraps of wood to create simple geometric planters or craft elaborate boxes with intricate details. You can paint them in bright colors, stain them for a rustic look, or leave them natural to let the wood grain shine through. These planters are perfect for showcasing your favorite plants and adding a touch of greenery to your space.

Modern and Minimalist Wood Projects

If you prefer a cleaner, more contemporary aesthetic, these modern and minimalist wood projects will elevate your space with a touch of sophistication.

Geometric Wooden Mirror

Elevate your entryway or bathroom with a statement-making wooden mirror. Create a geometric frame using thin strips of wood in a contrasting color. You can choose from simple squares, sleek triangles, or even intricate patterns. This project allows you to express your unique style while adding a touch of modern elegance to your space.

Wooden Storage Boxes

Keep your belongings organized in style with handcrafted wooden storage boxes. Use smooth, polished wood and simple geometric shapes to create a minimalist and functional design. You can use a single type of wood for a cohesive look or experiment with different types for a more eclectic feel. These boxes can be used to store jewelry, craft supplies, or even as decorative accents on your coffee table.

Wooden Coasters

Add a touch of sophistication to your coffee table with unique wooden coasters. Choose from smooth, polished wood or experiment with contrasting wood types to create striking designs. You can even add a personalized touch by engraving your initials or a special message on the coasters. These coasters are both practical and stylish, adding a touch of warmth to your living space.

Tips for Success with Your Wood Projects

Here are a few tips to make your wood project a success:

  • Start with a well-defined plan and gather all the necessary tools and materials before you begin.
  • Measure twice, cut once! Accuracy is crucial for a professional-looking finish.
  • Use the right type of wood for your project. Consider the desired look, durability, and ease of working with the wood.
  • Don't be afraid to experiment with different stains, paints, and finishes to achieve your desired look.
  • Take your time, enjoy the process, and be proud of your creation!

With a little creativity and effort, you can transform your home with stunning wood projects that reflect your unique style and bring a touch of warmth and charm to any room.

Monday, November 18, 2024

Crafting Picture Frames for Every Decor Style

Crafting Picture Frames for Every Decor Style

Picture frames are more than just functional objects; they serve as artistic accents that can elevate the aesthetic appeal of any space. From classic to contemporary, there's a picture frame style to complement every decor theme. By crafting your own frames, you gain the freedom to personalize their design, ensuring they perfectly match your vision and enhance the overall ambiance of your home. This comprehensive guide will delve into the art of crafting picture frames for various decor styles, empowering you to create stunning pieces that showcase your artistic flair.

Classic and Timeless Elegance

Classic decor styles exude a sense of sophistication and enduring charm. When crafting picture frames for a classic interior, prioritize timeless materials and understated designs:

Materials and Finishes

  • Wood: Opt for traditional hardwoods like oak, mahogany, or walnut, known for their rich grain patterns and durability. Choose a natural wood finish or a subtle stain to highlight the wood's natural beauty.
  • Metal: Polished brass, silver, or bronze frames create an air of elegance and formality. Consider using ornate details like acanthus leaf motifs or scrolling patterns for a vintage feel.
  • Glass: Crystal clear or slightly textured glass panels enhance the visual appeal of your artwork. Choose a matting that complements the chosen frame material, adding depth and contrast.

Design Elements

  • Simple Shapes: Rectangular or square frames with clean lines and minimal embellishments embody classic aesthetics. Avoid overly ornate or contemporary designs.
  • Distressed Finishes: A lightly distressed paint finish or a worn patina on metal frames adds a touch of vintage charm and history to the piece.
  • Gilded Accents: A subtle gold leaf trim or a touch of metallic paint on the frame's edges can enhance its luxurious feel.

Modern and Minimalist Aesthetics

Modern decor emphasizes clean lines, simplicity, and functionality. When crafting picture frames for a contemporary space, focus on sleek designs and neutral color palettes:

Materials and Finishes

  • Metal: Brushed stainless steel, black powder-coated metal, or polished chrome offer a clean and contemporary look. Choose thin, minimalist frames with minimal embellishments.
  • Acrylic: Transparent acrylic frames create an airy and unobtrusive presence, allowing the artwork to take center stage. Opt for clear or frosted acrylic depending on the desired effect.
  • Wood: Choose light-colored woods like maple or birch, painted in muted tones or left natural for a minimalist aesthetic. Consider simple geometric shapes for a modern touch.

Design Elements

  • Geometric Shapes: Squares, rectangles, and even circles with clean edges and sharp angles are perfect for modern spaces. Consider using geometric patterns for a touch of visual interest.
  • Floating Frames: Frames that appear to suspend the artwork without visible mounts create a sleek and contemporary look. Choose a frame slightly smaller than the artwork to achieve this effect.
  • Neutral Colors: Black, white, gray, and natural wood tones are staples of modern design. Choose a frame that blends seamlessly with the surrounding decor.

Rustic and Farmhouse Charm

Rustic and farmhouse styles embrace natural textures, weathered finishes, and a sense of warmth and comfort. When crafting picture frames for these spaces, prioritize natural materials and handcrafted details:

Materials and Finishes

  • Reclaimed Wood: Using repurposed wood beams, pallets, or barnwood adds character and a sense of history to the frame. Leave the wood natural or apply a distressed stain to enhance its rustic charm.
  • Metal: Blacksmith-forged iron or rustic galvanized metal frames with hammered textures or distressed finishes create a charming and unique look.
  • Natural Elements: Incorporate elements like twigs, branches, or woven materials into the frame design for a touch of natural beauty and texture.

Design Elements

  • Asymmetrical Shapes: Irregular or asymmetrical frames add a touch of whimsy and rustic charm. Consider using reclaimed wood in various shapes and sizes for a unique and handcrafted look.
  • Distressed Finishes: Sanding, distressing, and applying a layer of wax or paint over the wood adds a sense of age and authenticity. Consider using natural-toned paints or stains to complement the rustic aesthetic.
  • Rustic Hardware: Use simple, handcrafted metal hinges, latches, or hooks to add a touch of authenticity and charm.

Bohemian and Eclectic Flair

Bohemian decor embraces vibrant colors, mixed patterns, and eclectic styles. When crafting picture frames for a bohemian space, let your creativity soar and experiment with bold textures and unique designs:

Materials and Finishes

  • Wood: Paint wooden frames in bright colors, use patterned papers, or incorporate fabric swatches into the design. Embrace the use of natural materials like bamboo, rattan, or driftwood.
  • Metal: Antique brass or copper frames with intricate details and a tarnished finish add a touch of vintage glamour. Explore the use of unusual metals like pewter or silver for a unique look.
  • Textiles: Cover frames in vibrant fabrics, decorative trims, or woven tapestries. Use macrame or beading techniques to add a bohemian touch.

Design Elements

  • Intricate Details: Add embellishments like beads, shells, feathers, or dried flowers to the frame to create a vibrant and eye-catching look. Consider using multiple frames with different sizes and designs to create a playful and eclectic display.
  • Mixed Textures: Combine various textures like wood, metal, glass, fabric, and natural elements to create a multi-dimensional and visually stimulating effect.
  • Bold Colors: Embrace vibrant and contrasting colors that reflect the eclectic nature of bohemian style. Experiment with patterns and prints to create a visually dynamic display.

Tips for Crafting Your Own Picture Frames

Creating picture frames is a rewarding craft that allows you to personalize your home decor. Here are some essential tips to help you get started:

  • Plan Your Design: Sketch out your frame design and choose the materials you'll use. Consider the size and shape of the artwork you'll be framing, as well as the overall decor style of your space.
  • Prepare Your Materials: Cut and prepare your chosen materials. For wood frames, smooth the edges and sand them for a polished finish. For metal frames, ensure the metal is clean and free from any rust or imperfections.
  • Assemble the Frame: Carefully join the pieces of your frame using glue, screws, or other appropriate fastening methods. Ensure that the frame is sturdy and well-aligned.
  • Add Finishes: Apply paint, stain, or other finishes to the frame, depending on your chosen style. Be sure to let the finishes dry completely before proceeding to the next step.
  • Add Hardware: Attach hinges, latches, or any other hardware necessary for displaying your artwork. Choose hardware that complements the style and overall aesthetic of the frame.
  • Protect Your Artwork: Use glass or acrylic to protect your artwork from dust and damage. Choose the appropriate thickness and type of glazing for your artwork.
  • Matting: Consider using matting to enhance the visual appeal of your artwork. Choose matting colors and textures that complement the artwork and the frame design.
  • Finishing Touches: Once your frame is complete, add any decorative elements, like beads, embellishments, or personal touches, to enhance the overall aesthetic.

Crafting picture frames is an enjoyable and creative pursuit that allows you to personalize your home decor and showcase your artistic talents. With a little planning, creativity, and the right materials, you can create stunning picture frames that perfectly complement any decor style, enhancing the beauty and ambiance of your space.

Crafting Picture Frames for Every Decor Style

Crafting Picture Frames for Every Decor Style

Picture frames are more than just functional objects; they serve as artistic accents that can elevate the aesthetic appeal of any space. From classic to contemporary, there's a picture frame style to complement every decor theme. By crafting your own frames, you gain the freedom to personalize their design, ensuring they perfectly match your vision and enhance the overall ambiance of your home. This comprehensive guide will delve into the art of crafting picture frames for various decor styles, empowering you to create stunning pieces that showcase your artistic flair.

Classic and Timeless Elegance

Classic decor styles exude a sense of sophistication and enduring charm. When crafting picture frames for a classic interior, prioritize timeless materials and understated designs:

Materials and Finishes

  • Wood: Opt for traditional hardwoods like oak, mahogany, or walnut, known for their rich grain patterns and durability. Choose a natural wood finish or a subtle stain to highlight the wood's natural beauty.
  • Metal: Polished brass, silver, or bronze frames create an air of elegance and formality. Consider using ornate details like acanthus leaf motifs or scrolling patterns for a vintage feel.
  • Glass: Crystal clear or slightly textured glass panels enhance the visual appeal of your artwork. Choose a matting that complements the chosen frame material, adding depth and contrast.

Design Elements

  • Simple Shapes: Rectangular or square frames with clean lines and minimal embellishments embody classic aesthetics. Avoid overly ornate or contemporary designs.
  • Distressed Finishes: A lightly distressed paint finish or a worn patina on metal frames adds a touch of vintage charm and history to the piece.
  • Gilded Accents: A subtle gold leaf trim or a touch of metallic paint on the frame's edges can enhance its luxurious feel.

Modern and Minimalist Aesthetics

Modern decor emphasizes clean lines, simplicity, and functionality. When crafting picture frames for a contemporary space, focus on sleek designs and neutral color palettes:

Materials and Finishes

  • Metal: Brushed stainless steel, black powder-coated metal, or polished chrome offer a clean and contemporary look. Choose thin, minimalist frames with minimal embellishments.
  • Acrylic: Transparent acrylic frames create an airy and unobtrusive presence, allowing the artwork to take center stage. Opt for clear or frosted acrylic depending on the desired effect.
  • Wood: Choose light-colored woods like maple or birch, painted in muted tones or left natural for a minimalist aesthetic. Consider simple geometric shapes for a modern touch.

Design Elements

  • Geometric Shapes: Squares, rectangles, and even circles with clean edges and sharp angles are perfect for modern spaces. Consider using geometric patterns for a touch of visual interest.
  • Floating Frames: Frames that appear to suspend the artwork without visible mounts create a sleek and contemporary look. Choose a frame slightly smaller than the artwork to achieve this effect.
  • Neutral Colors: Black, white, gray, and natural wood tones are staples of modern design. Choose a frame that blends seamlessly with the surrounding decor.

Rustic and Farmhouse Charm

Rustic and farmhouse styles embrace natural textures, weathered finishes, and a sense of warmth and comfort. When crafting picture frames for these spaces, prioritize natural materials and handcrafted details:

Materials and Finishes

  • Reclaimed Wood: Using repurposed wood beams, pallets, or barnwood adds character and a sense of history to the frame. Leave the wood natural or apply a distressed stain to enhance its rustic charm.
  • Metal: Blacksmith-forged iron or rustic galvanized metal frames with hammered textures or distressed finishes create a charming and unique look.
  • Natural Elements: Incorporate elements like twigs, branches, or woven materials into the frame design for a touch of natural beauty and texture.

Design Elements

  • Asymmetrical Shapes: Irregular or asymmetrical frames add a touch of whimsy and rustic charm. Consider using reclaimed wood in various shapes and sizes for a unique and handcrafted look.
  • Distressed Finishes: Sanding, distressing, and applying a layer of wax or paint over the wood adds a sense of age and authenticity. Consider using natural-toned paints or stains to complement the rustic aesthetic.
  • Rustic Hardware: Use simple, handcrafted metal hinges, latches, or hooks to add a touch of authenticity and charm.

Bohemian and Eclectic Flair

Bohemian decor embraces vibrant colors, mixed patterns, and eclectic styles. When crafting picture frames for a bohemian space, let your creativity soar and experiment with bold textures and unique designs:

Materials and Finishes

  • Wood: Paint wooden frames in bright colors, use patterned papers, or incorporate fabric swatches into the design. Embrace the use of natural materials like bamboo, rattan, or driftwood.
  • Metal: Antique brass or copper frames with intricate details and a tarnished finish add a touch of vintage glamour. Explore the use of unusual metals like pewter or silver for a unique look.
  • Textiles: Cover frames in vibrant fabrics, decorative trims, or woven tapestries. Use macrame or beading techniques to add a bohemian touch.

Design Elements

  • Intricate Details: Add embellishments like beads, shells, feathers, or dried flowers to the frame to create a vibrant and eye-catching look. Consider using multiple frames with different sizes and designs to create a playful and eclectic display.
  • Mixed Textures: Combine various textures like wood, metal, glass, fabric, and natural elements to create a multi-dimensional and visually stimulating effect.
  • Bold Colors: Embrace vibrant and contrasting colors that reflect the eclectic nature of bohemian style. Experiment with patterns and prints to create a visually dynamic display.

Tips for Crafting Your Own Picture Frames

Creating picture frames is a rewarding craft that allows you to personalize your home decor. Here are some essential tips to help you get started:

  • Plan Your Design: Sketch out your frame design and choose the materials you'll use. Consider the size and shape of the artwork you'll be framing, as well as the overall decor style of your space.
  • Prepare Your Materials: Cut and prepare your chosen materials. For wood frames, smooth the edges and sand them for a polished finish. For metal frames, ensure the metal is clean and free from any rust or imperfections.
  • Assemble the Frame: Carefully join the pieces of your frame using glue, screws, or other appropriate fastening methods. Ensure that the frame is sturdy and well-aligned.
  • Add Finishes: Apply paint, stain, or other finishes to the frame, depending on your chosen style. Be sure to let the finishes dry completely before proceeding to the next step.
  • Add Hardware: Attach hinges, latches, or any other hardware necessary for displaying your artwork. Choose hardware that complements the style and overall aesthetic of the frame.
  • Protect Your Artwork: Use glass or acrylic to protect your artwork from dust and damage. Choose the appropriate thickness and type of glazing for your artwork.
  • Matting: Consider using matting to enhance the visual appeal of your artwork. Choose matting colors and textures that complement the artwork and the frame design.
  • Finishing Touches: Once your frame is complete, add any decorative elements, like beads, embellishments, or personal touches, to enhance the overall aesthetic.

Crafting picture frames is an enjoyable and creative pursuit that allows you to personalize your home decor and showcase your artistic talents. With a little planning, creativity, and the right materials, you can create stunning picture frames that perfectly complement any decor style, enhancing the beauty and ambiance of your space.

Friday, November 15, 2024

How to Build Wine Racks That Sell Fast at Craft Fairs

Building Wine Racks for Craft Fairs: A Guide to Success

Craft fairs offer a unique platform for artisans to showcase their creations and connect directly with potential customers. If you're looking for a product that combines practicality, elegance, and strong appeal, consider building wine racks. With the growing popularity of wine culture and the increasing desire for personalized home decor, well-crafted wine racks are sure to attract buyers and boost your craft fair sales.

Understanding the Wine Rack Market

Before you embark on your wine rack building journey, it's essential to understand the market you're targeting. Consider the following:

Target Audience

  • Wine Enthusiasts: These individuals are passionate about wine and may be looking for a stylish and functional way to display their collection.
  • Home Decor Lovers: Wine racks can serve as beautiful decorative pieces, appealing to those who appreciate handcrafted items.
  • Gift Seekers: Wine racks make excellent gifts for housewarmings, birthdays, or special occasions.
  • Rustic and Industrial Styles: Reclaimed wood, metal accents, and unfinished finishes are highly sought after.
  • Minimalist and Modern Designs: Clean lines, geometric shapes, and sleek materials are popular choices for contemporary homes.
  • Personalized Touches: Customized wine racks with engraved names or special messages add a personal touch.

Crafting Compelling Wine Racks

Once you have a clear understanding of your target market, you can start designing and building wine racks that will sell fast at craft fairs.

Choosing the Right Materials

  • Wood: Pine, oak, cedar, and walnut are popular choices for their durability, natural beauty, and ability to be stained or painted.
  • Metal: Iron, steel, and copper offer a more industrial look and can be combined with wood for interesting contrasts.
  • Acrylic: Clear acrylic panels can create a modern and minimalist aesthetic.

Designing for Function and Aesthetics

  • Size: Consider the different bottle sizes and the storage capacity buyers may need.
  • Shape: Explore various shapes, from classic rectangular to creative geometric designs.
  • Stability: Ensure the rack is sturdy enough to hold the weight of wine bottles.
  • Accessibility: Design the rack for easy access to bottles.
  • Finishing Touches: Stains, paints, and clear coats can enhance the appearance and provide protection.

Marketing and Selling at Craft Fairs

To ensure your wine racks sell fast at craft fairs, effective marketing and presentation are crucial.

Crafting a Strong Brand

  • Name and Logo: Choose a memorable name for your business and create a visually appealing logo that reflects your style.
  • Website and Social Media: Establish an online presence to showcase your work and connect with potential customers.
  • Business Cards: Distribute professionally designed business cards with your contact information.

Eye-Catching Display

  • Booth Design: Create a clean and inviting booth that highlights your wine racks.
  • Lighting: Use appropriate lighting to showcase your products and create an appealing atmosphere.
  • Signage: Clear and concise signage should clearly display your business name and a brief description of your products.

Strategic Pricing

  • Cost Analysis: Determine the cost of materials, labor, and overhead to establish a fair pricing structure.
  • Competitor Research: Research the pricing of similar products at other craft fairs to ensure your prices are competitive.
  • Value Proposition: Highlight the unique features and quality of your wine racks to justify the price point.

Engaging with Customers

  • Friendly and Knowledgeable: Greet customers warmly and be prepared to answer questions about your products.
  • Demonstrations: Show customers how the wine racks function and highlight their unique features.
  • Personalized Service: Offer to personalize wine racks with names or messages.

Tips for Success

  • Attend Multiple Fairs: Participating in different craft fairs will increase your exposure to potential buyers.
  • Network with Other Artisans: Building relationships with fellow artisans can lead to opportunities for collaboration and referrals.
  • Gather Customer Feedback: Ask customers for feedback on their purchasing experience and use it to improve your products and services.
  • Stay Updated on Trends: Keep abreast of the latest design trends in wine racks and adapt your creations accordingly.

By combining quality craftsmanship, effective marketing, and a passion for creating beautiful and functional wine racks, you can achieve success in the craft fair marketplace.

How to Build Wine Racks That Sell Fast at Craft Fairs

Building Wine Racks for Craft Fairs: A Guide to Success

Craft fairs offer a unique platform for artisans to showcase their creations and connect directly with potential customers. If you're looking for a product that combines practicality, elegance, and strong appeal, consider building wine racks. With the growing popularity of wine culture and the increasing desire for personalized home decor, well-crafted wine racks are sure to attract buyers and boost your craft fair sales.

Understanding the Wine Rack Market

Before you embark on your wine rack building journey, it's essential to understand the market you're targeting. Consider the following:

Target Audience

  • Wine Enthusiasts: These individuals are passionate about wine and may be looking for a stylish and functional way to display their collection.
  • Home Decor Lovers: Wine racks can serve as beautiful decorative pieces, appealing to those who appreciate handcrafted items.
  • Gift Seekers: Wine racks make excellent gifts for housewarmings, birthdays, or special occasions.
  • Rustic and Industrial Styles: Reclaimed wood, metal accents, and unfinished finishes are highly sought after.
  • Minimalist and Modern Designs: Clean lines, geometric shapes, and sleek materials are popular choices for contemporary homes.
  • Personalized Touches: Customized wine racks with engraved names or special messages add a personal touch.

Crafting Compelling Wine Racks

Once you have a clear understanding of your target market, you can start designing and building wine racks that will sell fast at craft fairs.

Choosing the Right Materials

  • Wood: Pine, oak, cedar, and walnut are popular choices for their durability, natural beauty, and ability to be stained or painted.
  • Metal: Iron, steel, and copper offer a more industrial look and can be combined with wood for interesting contrasts.
  • Acrylic: Clear acrylic panels can create a modern and minimalist aesthetic.

Designing for Function and Aesthetics

  • Size: Consider the different bottle sizes and the storage capacity buyers may need.
  • Shape: Explore various shapes, from classic rectangular to creative geometric designs.
  • Stability: Ensure the rack is sturdy enough to hold the weight of wine bottles.
  • Accessibility: Design the rack for easy access to bottles.
  • Finishing Touches: Stains, paints, and clear coats can enhance the appearance and provide protection.

Marketing and Selling at Craft Fairs

To ensure your wine racks sell fast at craft fairs, effective marketing and presentation are crucial.

Crafting a Strong Brand

  • Name and Logo: Choose a memorable name for your business and create a visually appealing logo that reflects your style.
  • Website and Social Media: Establish an online presence to showcase your work and connect with potential customers.
  • Business Cards: Distribute professionally designed business cards with your contact information.

Eye-Catching Display

  • Booth Design: Create a clean and inviting booth that highlights your wine racks.
  • Lighting: Use appropriate lighting to showcase your products and create an appealing atmosphere.
  • Signage: Clear and concise signage should clearly display your business name and a brief description of your products.

Strategic Pricing

  • Cost Analysis: Determine the cost of materials, labor, and overhead to establish a fair pricing structure.
  • Competitor Research: Research the pricing of similar products at other craft fairs to ensure your prices are competitive.
  • Value Proposition: Highlight the unique features and quality of your wine racks to justify the price point.

Engaging with Customers

  • Friendly and Knowledgeable: Greet customers warmly and be prepared to answer questions about your products.
  • Demonstrations: Show customers how the wine racks function and highlight their unique features.
  • Personalized Service: Offer to personalize wine racks with names or messages.

Tips for Success

  • Attend Multiple Fairs: Participating in different craft fairs will increase your exposure to potential buyers.
  • Network with Other Artisans: Building relationships with fellow artisans can lead to opportunities for collaboration and referrals.
  • Gather Customer Feedback: Ask customers for feedback on their purchasing experience and use it to improve your products and services.
  • Stay Updated on Trends: Keep abreast of the latest design trends in wine racks and adapt your creations accordingly.

By combining quality craftsmanship, effective marketing, and a passion for creating beautiful and functional wine racks, you can achieve success in the craft fair marketplace.